Configuring nvmrc
Introduction
When developing multiple projects, each project may require a different Node.js version. In such cases, we need to specify the Node.js version for each project by executing the nvm install and nvm use commands in the terminal to install and switch versions.
However, manually executing commands in the terminal each time becomes cumbersome, especially as the number of projects increases. It's easy to forget to switch versions or switch to the wrong version, which can cause projects to fail to start or encounter errors during runtime.
This is where we need a method to manage Node.js versions and automatically switch between them, and this is where .nvmrc comes into play.
What is .nvmrc?
From the explanation above, you can understand that the .nvmrc file is used to manage the Node.js version for our project. This file is very simple: it contains only text representing a Node.js version that nvm can recognize, such as v18.12.0.
How to use the .nvmrc file?
You can create a .nvmrc file with content that is a Node.js version number or other text that nvm can understand. For details, you can type nvm --help in the terminal.
With the .nvmrc file, when you execute commands like nvm use, nvm install, nvm exec, nvm run, and nvm which in the terminal without specifying a version, the version specified in the .nvmrc file will be used.
Creating a .nvmrc file
For example, in the current directory, to have nvm specify the latest release of version 18.12, the latest LTS version, or the latest Node.js version, you can use the echo command to create a .nvmrc file:
bash
$ echo "18.12" > .nvmrc
# Set to the latest LTS version
$ echo "lts/*" > .nvmrc
# Set to the latest version
$ echo "node" > .nvmrc
Commands like nvm use will traverse the directory structure upwards from the current directory looking for the .nvmrc file. This means that running commands like nvm use in any subdirectory of a directory with a .nvmrc file will still use that .nvmrc file.
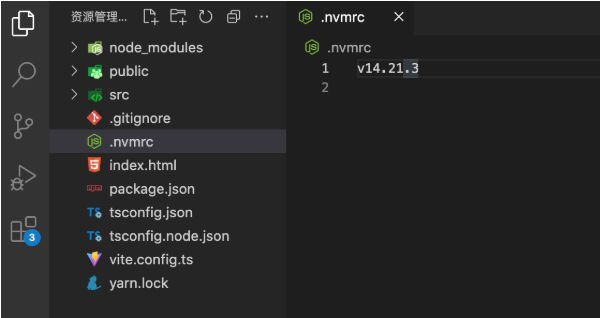
The .nvmrc file must contain a <version> that conforms to what is listed in nvm --help, followed by a newline. Trailing spaces are not allowed, and a trailing newline is required.
As shown in the image below, there is no space after v14.21.3, just a line break.
Deep integration with shell terminals
You can use avn to deeply integrate with your shell and automatically invoke nvm when changing directories.
If you prefer a lightweight solution, you can use the method below.
Automatically switch Node.js versions in zsh terminal based on .nvmrc file
After adding the following code to your $HOME/.zshrc, nvm use will be automatically called whenever you enter a directory containing a .nvmrc file. The string in the .nvmrc file tells nvm which version of Node.js to use.
bash
# Open home directory and edit .zshrc file
$ cd
$ vi .zshrc
This is the code that needs to be written to .zshrc:
bash
# Copy this code segment to the .zshrc file
# place this after nvm initialization!
autoload -U add-zsh-hook
load-nvmrc() {
  local nvmrc_path="$(nvm_find_nvmrc)"

  if [ -n "$nvmrc_path" ]; then
    local nvmrc_node_version=$(nvm version "$(cat "${nvmrc_path}")")

    if [ "$nvmrc_node_version" = "N/A" ]; then
      nvm install
    elif [ "$nvmrc_node_version" != "$(nvm version)" ]; then
      nvm use
    fi
  elif [ -n "$(PWD=$OLDPWD nvm_find_nvmrc)" ] && [ "$(nvm version)" != "$(nvm version default)" ]; then
    echo "Reverting to nvm default version"
    nvm use default
  fi
}
add-zsh-hook chpwd load-nvmrc
load-nvmrc
After editing the .zshrc file, execute source .zshrc to make the command take effect:
bash
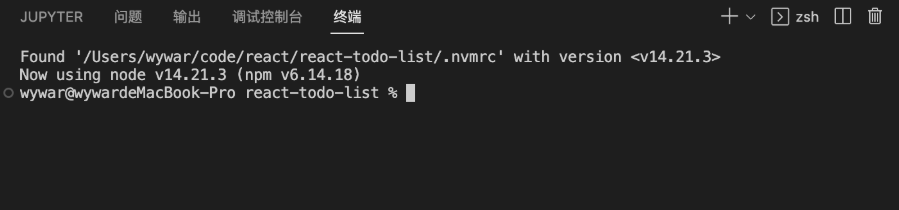
$ source ~/.zshrcIn projects with a .nvmrc file, when you open the integrated terminal in vscode, you'll find that nvm use is automatically executed, with corresponding output in the command line.